What Photos Should You Take?
Great photography builds trust and helps buyers assess the watch accurately. Follow these guidelines to present your timepiece professionally and maximise buyer interest.
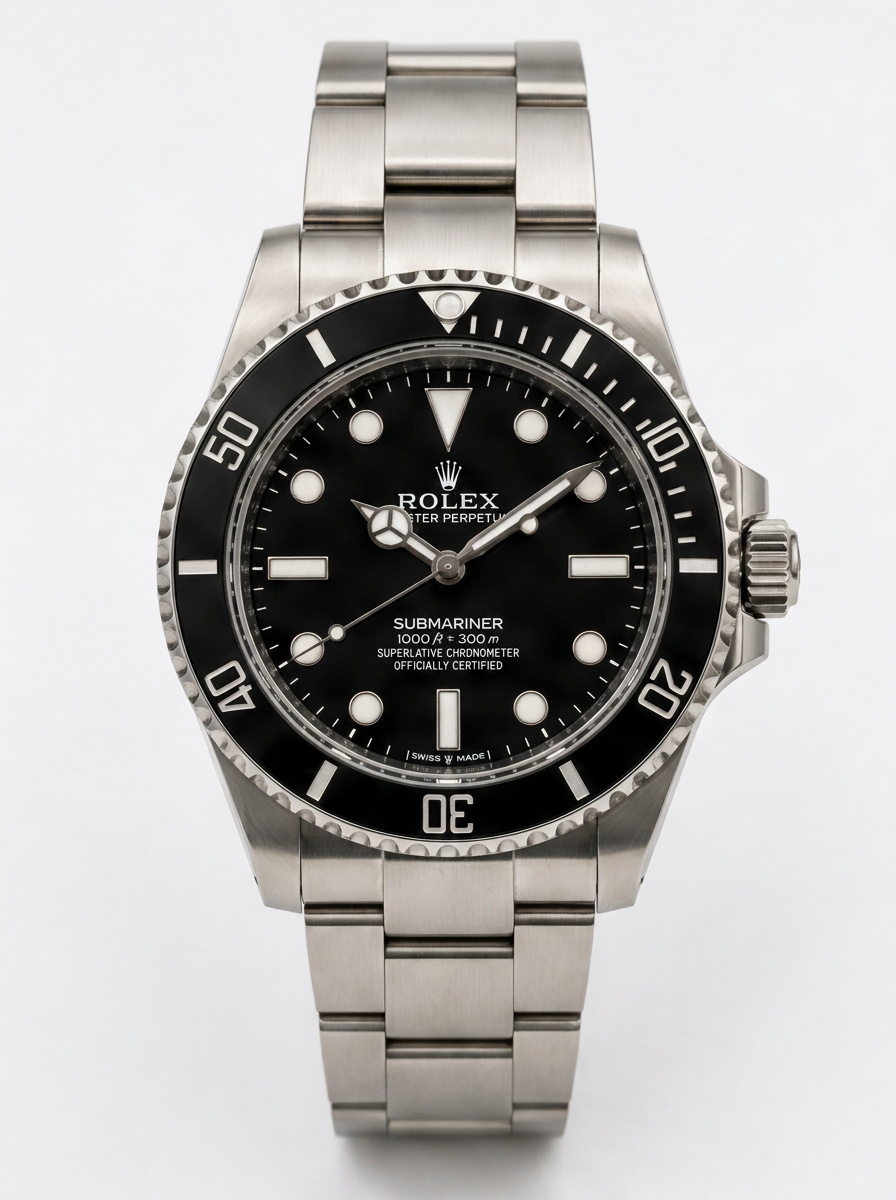
Main Listing Photo
The primary image must show only the watch.
Do not include
- Boxes, papers, warranty cards, tags, accessories, or tools
- Store branding, logos, displays, or promotional materials
- Any text overlays, watermarks, or labels
Best practices
- Position the watch in the centre of the frame
- Ensure the entire watch is visible — bracelet, strap, case, and lugs
- Photograph in landscape orientation
- Use a clean, uncluttered background
Lighting
Good lighting is one of the most important factors in creating professional-looking images.
Recommended
- Photograph in natural daylight near a window
- Use a bright, evenly lit environment
- Diffused sunlight often produces the best results
Avoid
- Direct camera flash
- Harsh reflections on the crystal or dial
- Strong shadows that obscure details
Flash photography can distort colours, create glare on the crystal, and hide important details of the dial and case finish.
Image Quality
Your photos should be sharp, detailed, and high resolution.
- Ensure the dial and case are perfectly in focus
- Tap the watch on your smartphone screen to lock focus before taking the photo
- Keep the camera steady, or use a tripod if available
- Upload original images whenever possible — do not reduce size or resolution after shooting
Composition & Hand Position
Present the watch and any included items in a clear and organised manner.
For the most attractive appearance, set the watch to approximately 10:10 before photographing. This position:
- Creates a balanced look
- Keeps branding visible
- Prevents the hands from covering important dial details
Condition & Transparency
Before photographing, remove dust and fingerprints, clean the crystal and bracelet carefully, and check for lint or smudges that may become visible in high-resolution photos.
If the watch shows signs of wear, include clear close-up images of scratches, dents, or marks. Accurate photos build trust and reduce questions from buyers.
Recommended Watch Photo Set
Aim for 10–12 images covering the following shots:
Hero Shot (Main Photo)
The watch only, centered, landscape orientation, clean background.
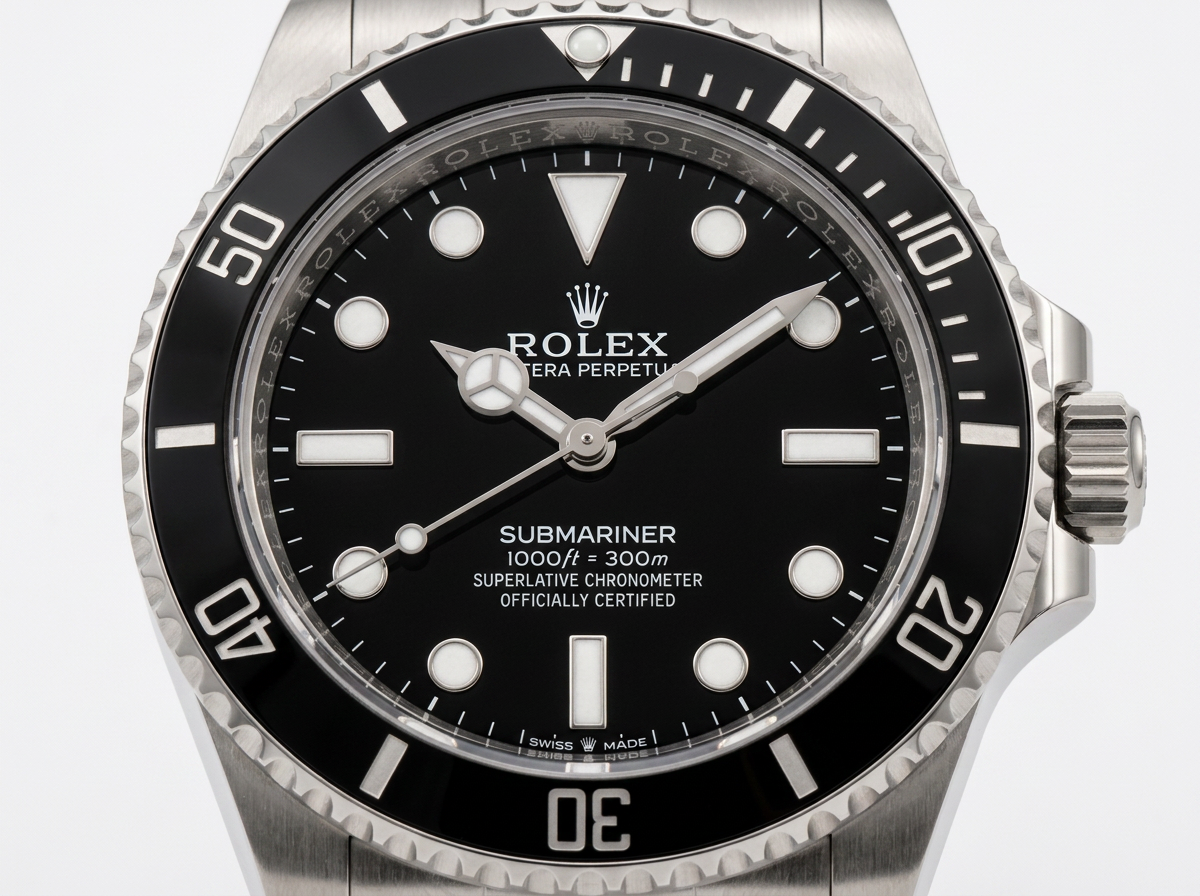
Straight-On Dial Shot
Full view of the dial showing color, markers, hands, and overall condition.
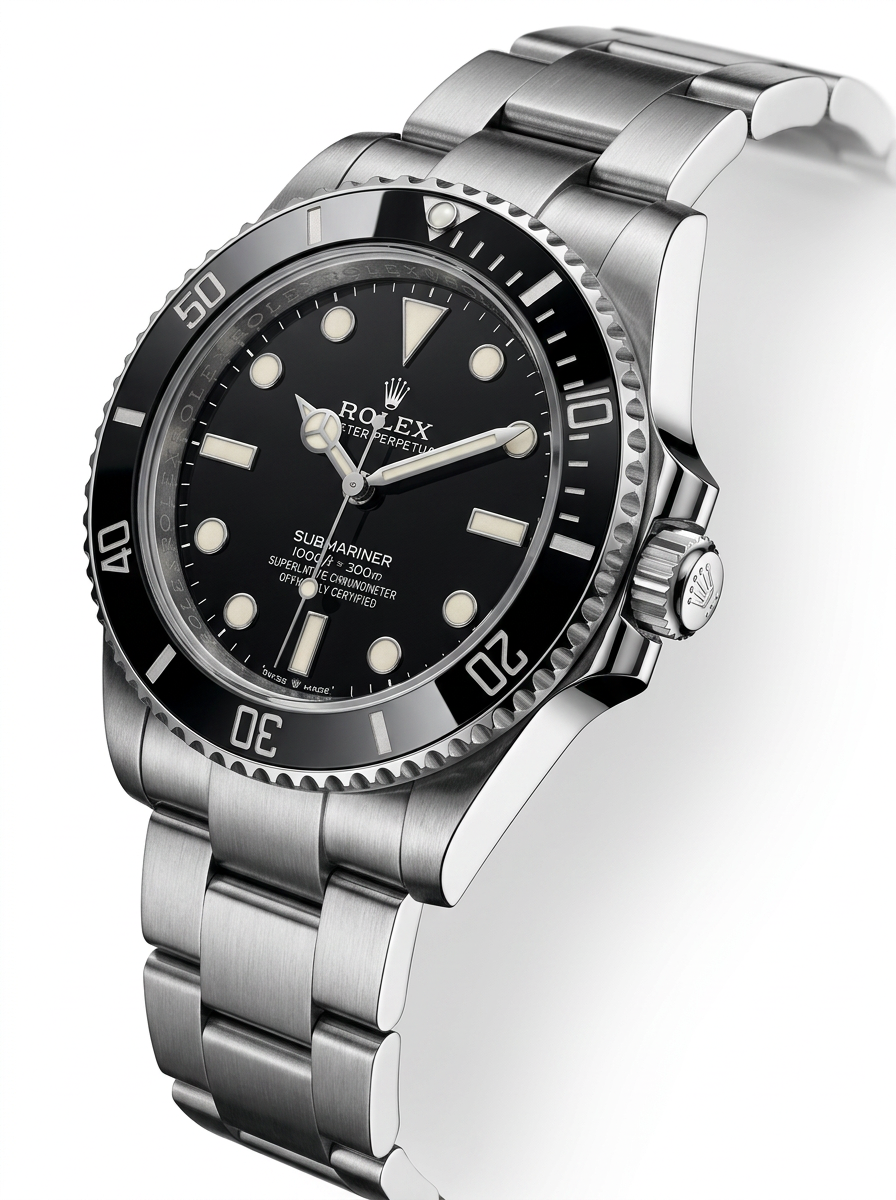
Three-Quarter Angle
A slightly angled image that shows case shape, bezel, and crystal depth.
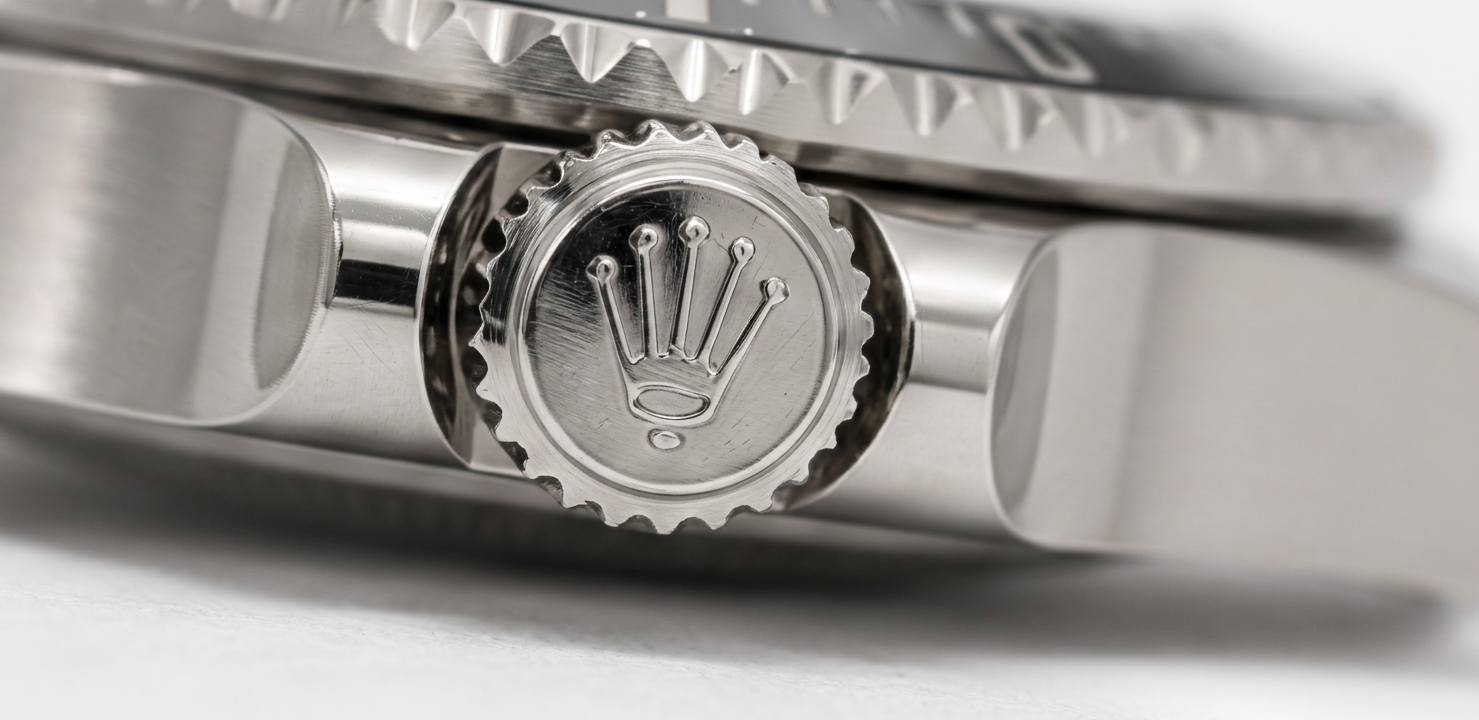
Crown Detail
Close-up of the crown, guards, and case side.
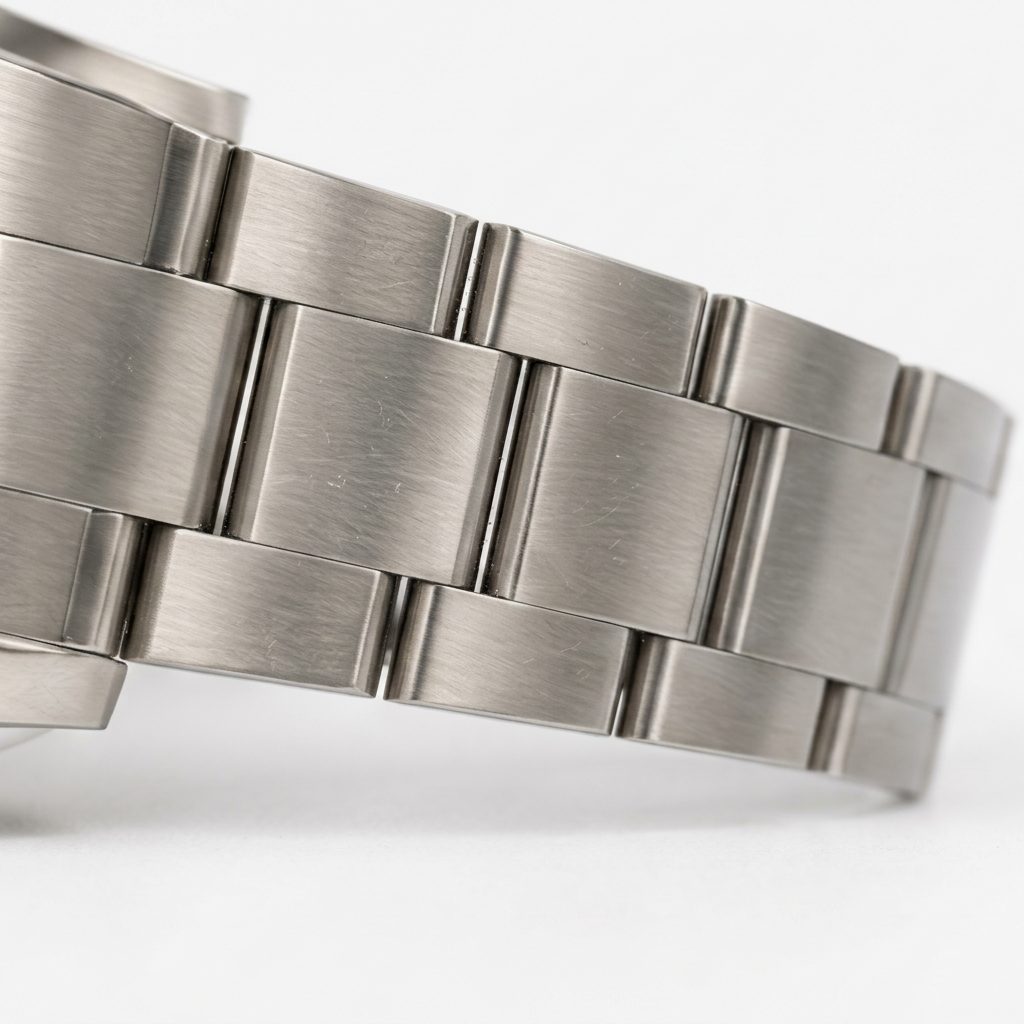
Bracelet or Strap Detail
Shows condition, links, stitching, or clasp quality.
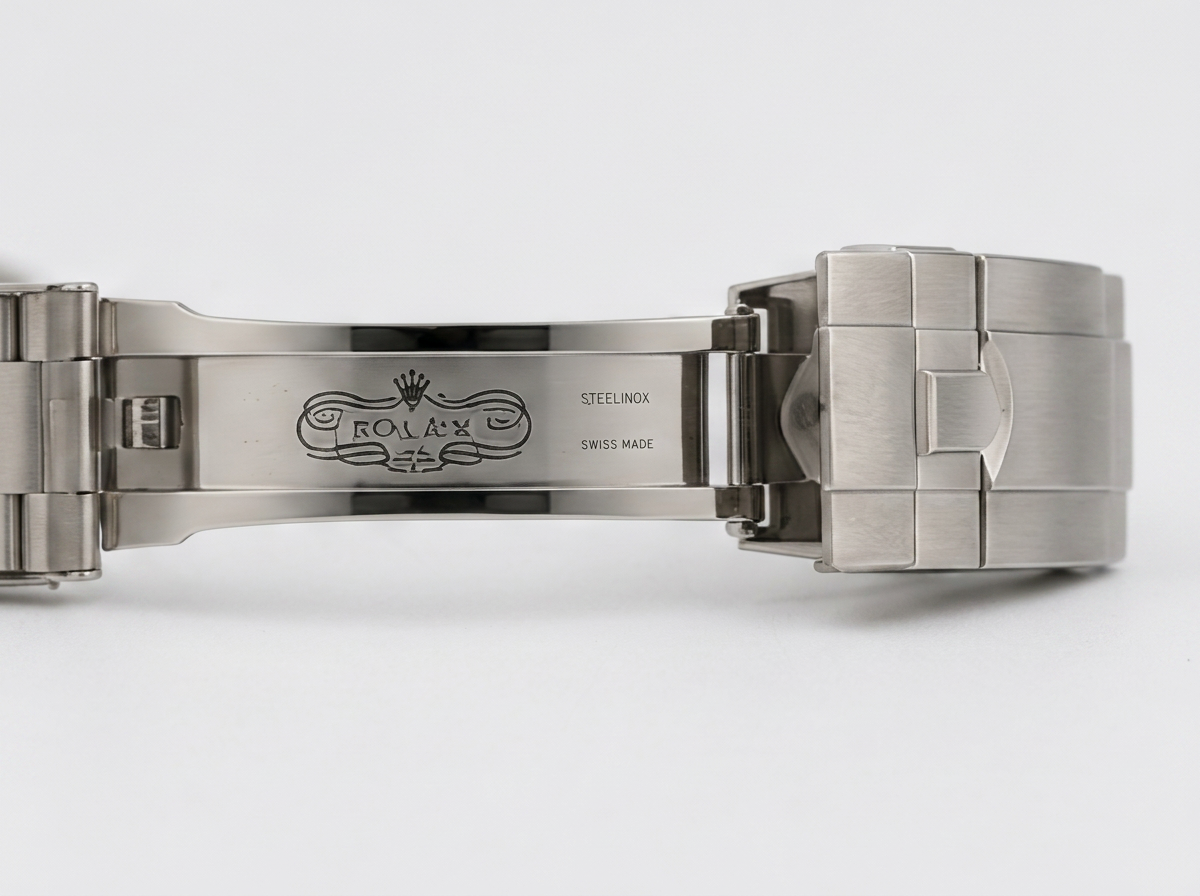
Clasp and Buckle
Close-up of logos, engravings, and wear condition.
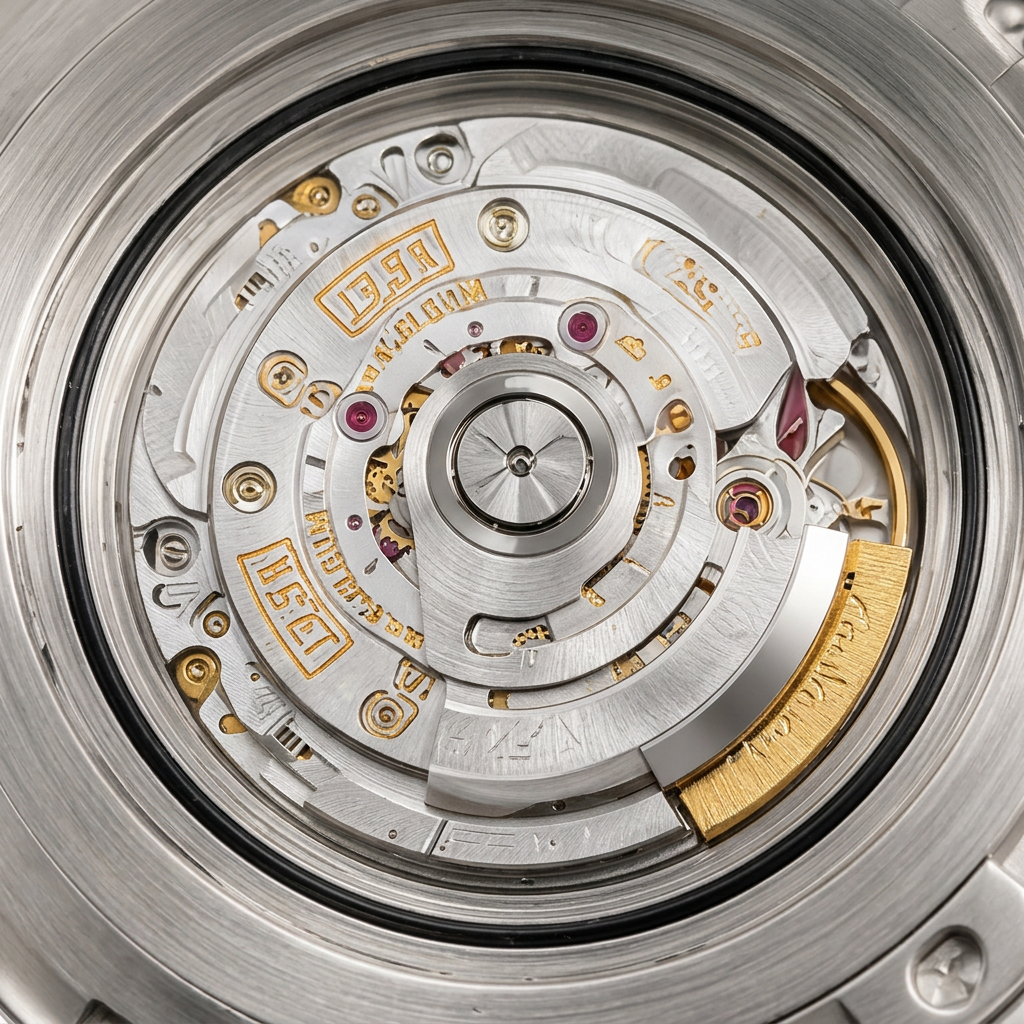
Movement (If Applicable)
For watches with visible movements or removable casebacks.
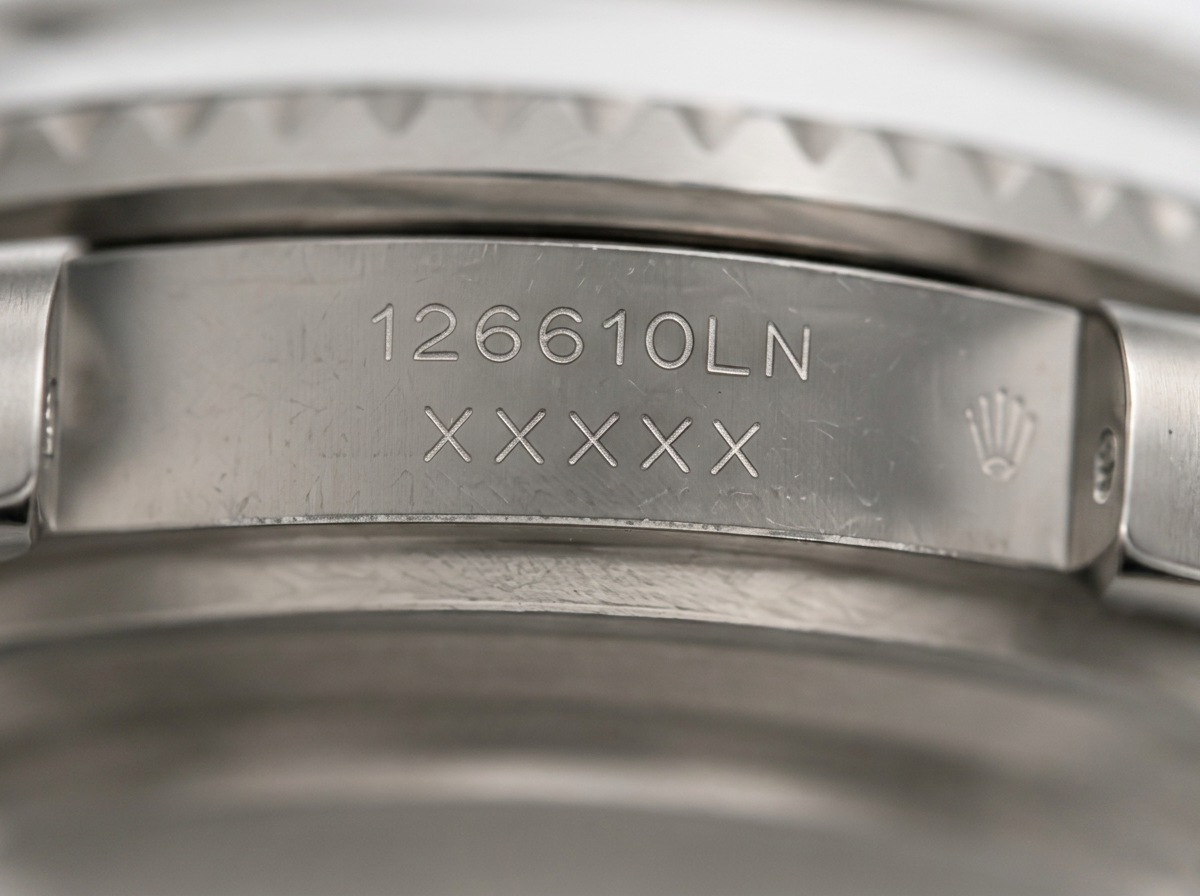
Serial / Reference Information
Reference number, model information, or warranty card details.

Box and Papers
Organized image of all included accessories.
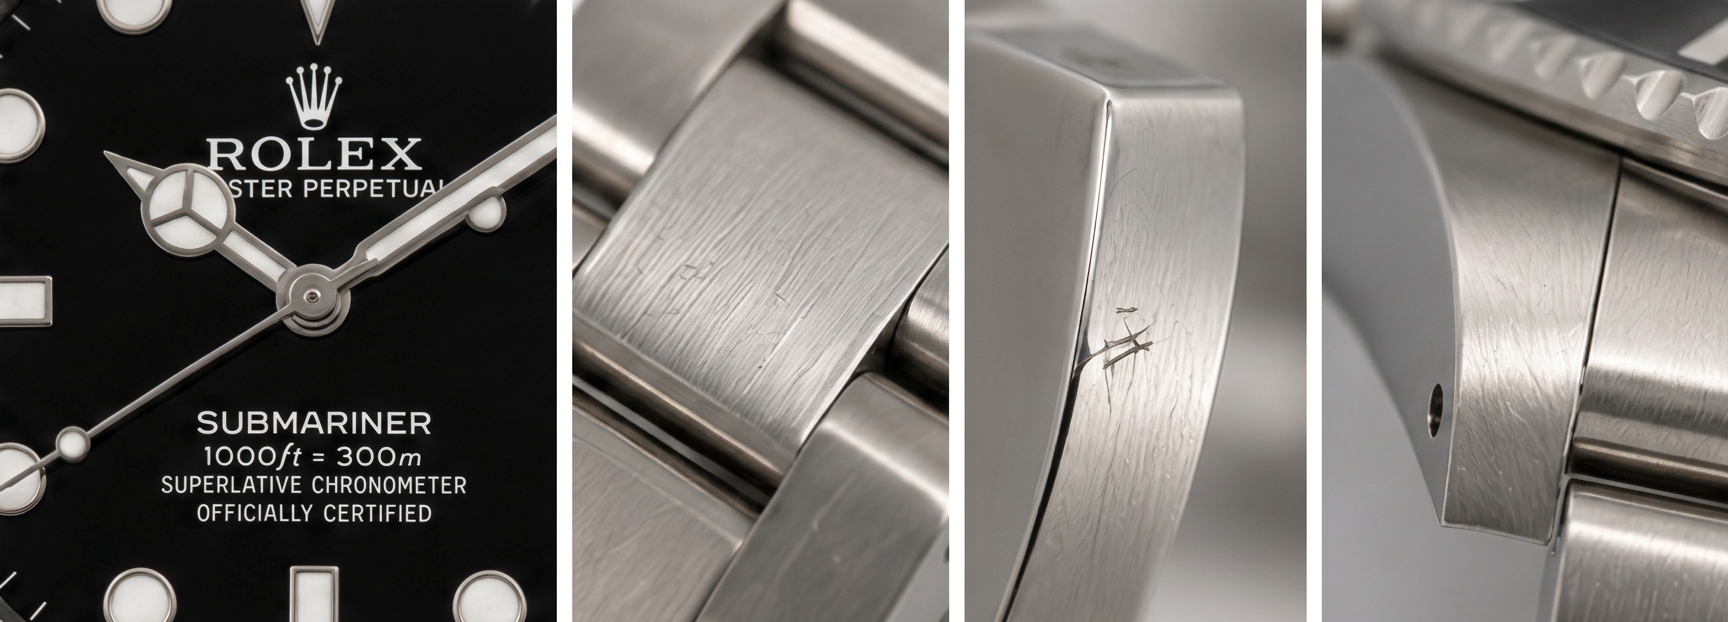
Honest Condition Close-Ups
Any scratches, dents, or imperfections shown clearly.
Example Shooting Setup
A simple, professional setup can be created with:
- A table near a large window
- A white or light-grey background
- Indirect natural daylight
- A smartphone camera in standard photo mode
- A microfibre cloth for cleaning
This is often enough to produce photos that look professional, trustworthy, and attractive to potential buyers.